Xcode is the tool that is used to create different apps for Apple users. It is the platform that is work and runs on the Mac environment
To download and install the Xcode on your device make sure that you have a good internet connection that can take less time to precede the task. It can take 8 gigabits of storage. Make sure you have internal storage on the basis of the software tool you may download to your system. For efficiently working the Xcode you need to have 30 gigabits of space in your device. It can also help when you unzip the application software.
Download And Install Xcode IDE
To download and install the Xcode on a Mac device follow the steps:-
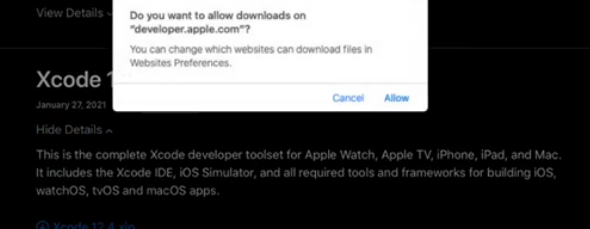
- Download via App store or official website https://developer.apple.com/downlod/more/
- Open the app store and search on the Xcode (it is not a compatible method) and download on your device otherwise select the website and click on the Xcode download option- make sure that your mac is compatible with the Xcode.

- Download the Xcode version compatible with your device
- It takes a few seconds to download
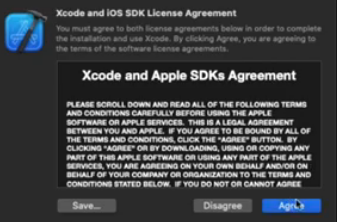
- After the downloading, open the Xcode folder
- Agree to the terms and the condition and accept it
- Enter your system Password
- The Installation process continues and takes a few seconds
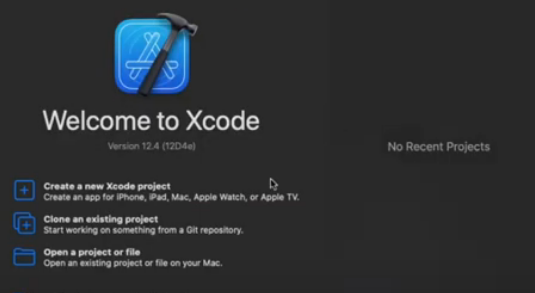
- Now you can view the message that Xcode download and install successfully
- You can view the Window panel on your screen
To create a new iOS App project from Scratch on Xcode
- You can choose any template as per your choice
- You can view the different tabs on the topmost side
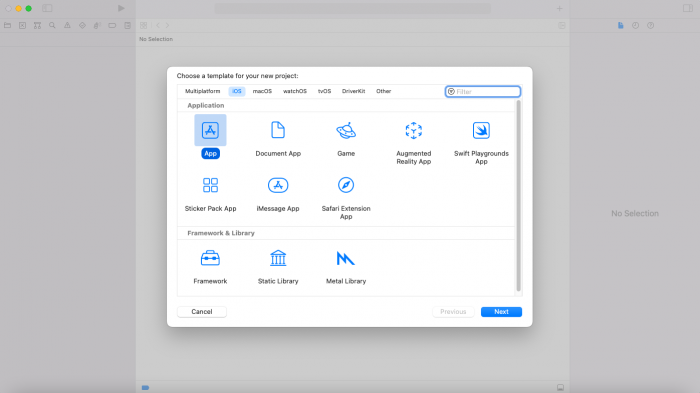
- Choose the iOS type if you want to create an app for the specific system
- It is basically a customized app and doesn’t assume anything to modify that users need to perform
- Click on the next option
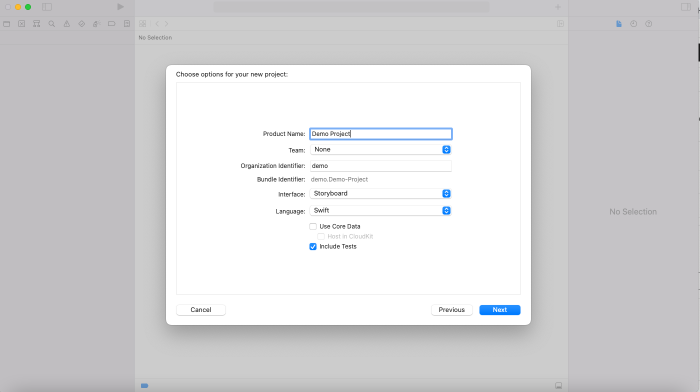
- The screen may display, we have to add the product name or app name. You can choose a demo app
- In the bundle identifier option – which is basically a web address – make sure that your web address is unique so that you can find and locate it on the app store
- In the team option -You can also fill out your Apple ID otherwise fill out none
- In the interface option – if you are creating for the storyboard then choose it
- Language – it is important that the language you choose is Swift
- Click on the next option
- Now, the save dialog box appears – you can select the location where you want to locate the app
- Now your new project created successfully
- Whenever you create any program “Hello World “ appear on the screen

- Select the simulator to run the project
- Choose the iOS and anyone you want
- It takes some time to built
- Now you can view the Hello World message on the app screen.
These are the steps that help you to create the Project on Xcode in an easy manner.